


How to Install LED Strip Lights Without an Electrician
Learn how to perform a DIY LED strip light installation and transform your space without an electrician. Explore creative LED strip ideas and step-by-step tips.
LED strip lights can transform any space, adding a touch of elegance, vibrancy, and modernity. Whether you're looking to accentuate your living room, illuminate your kitchen counters, or create mood lighting in your bedroom, LED strip lighting are a versatile solution. The best part? You don't need an electrician to install them. With a little guidance, you can embark on a DIY journey to set up these lights yourself. In this article, we will guide you through the process of installing LED strip lights, exploring some creative ideas, and ensuring you get the best results.
Before diving into the installation process, it's essential to understand what LED strip lights are and how they work. LED strip lights are flexible circuit boards populated with light-emitting diodes (LEDs) that can be easily adhered to various surfaces. These lights come in various colors and brightness levels, and many can be controlled via remote or smartphone apps.
- SingleColorLEDStrips:Theseemitonecolorandareidealforstraightforwardlightingapplications.
- RGBLEDStrips:Capableofproducingawiderangeofcolorsbymixingred,green,andblueLEDs.
- RGBWLEDStrips:InadditiontoRGBcolors,theyhaveaseparatewhiteLEDforapurerwhitelight.
- Addressable LED Strips: Each LED can be individually controlled, allowing for complex lighting effects and animations.
Tools and Materials Needed
TosuccessfullyinstallLEDstriplights,gatherthefollowingtoolsandmaterials:
- LEDstriplightkit(includesLEDstrip,powersupply,andconnectors)
- Measuringtape
- Scissors
- Rubbingalcoholandcloth
- Electricaltapeorheatshrinktubing
- Optional: Wire cutters, soldering iron, or connectors for more complex installations
Step-by-Step Installation Guide
Step 1: Plan Your Installation
Before you start, decide where you want to place the LED strip lights. Popular locations include under kitchen cabinets, along coving or molding, around mirrors, or beneath shelves. Measure the area to determine the length of the LED strip required. Consider the power source location to ensure the strip can reach without tension.
Step 2: Prepare the Surface
A clean surface is crucial for the adhesive on the back of the LED strip to stick properly. Use rubbing alcohol and a cloth to clean the area where you plan to install the lights. Allow the surface to dry completely before proceeding.
Step 3: Cut the LED Strip to Size
Most LED strips can be cut at designated points, usually marked by a small line or scissor icon. Use scissors to cut the strip to the desired length. If your strip lights are not already waterproof, be cautious with outdoor installations.
Step 4: Connect the LED Strip
For longer installations requiring multiple strips, use connectors to join them. If necessary, use a soldering iron to connect wires, but be careful not to overheat and damage the strip. Secure connections with electrical tape or heat shrink tubing to prevent short circuits.
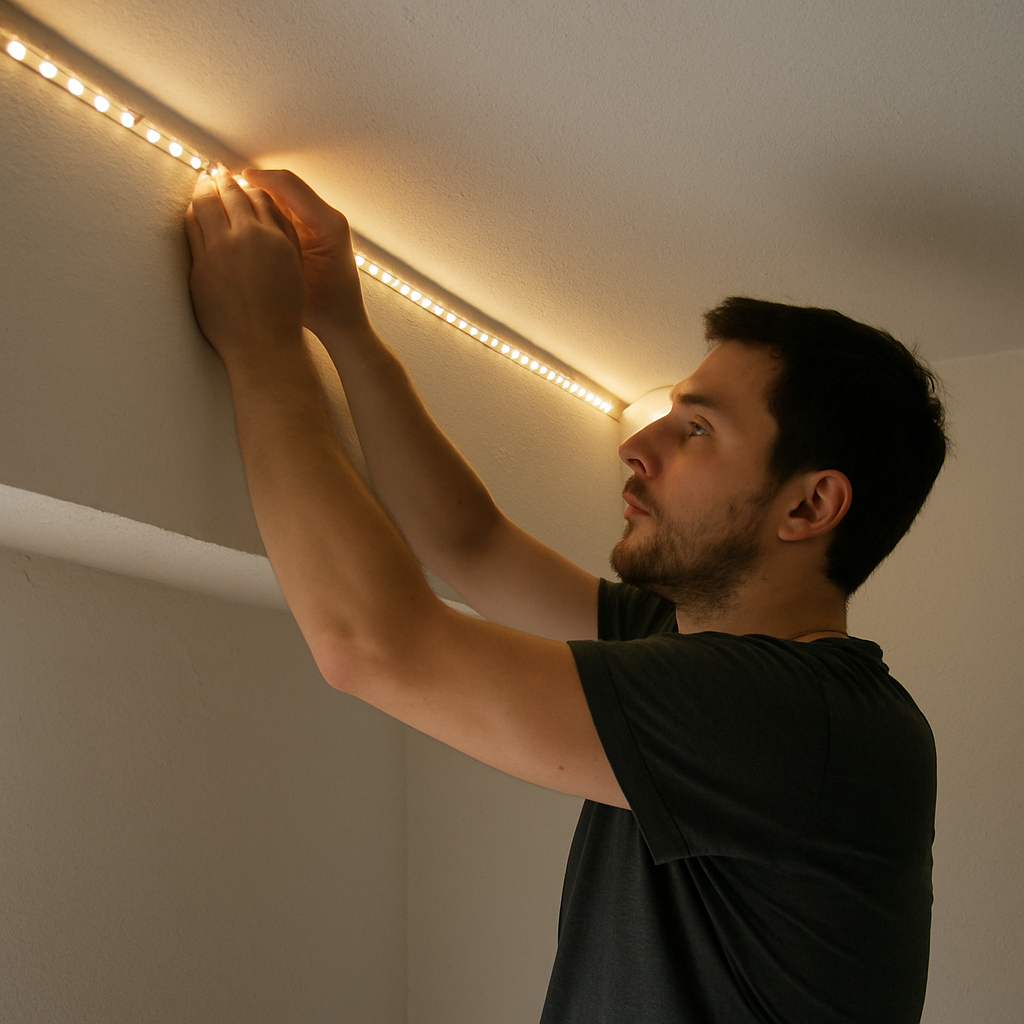
Step 5: Adhere the LED Strip
Peel off the protective backing from the adhesive side of the LED strip. Carefully position the strip along the planned path, pressing it firmly onto the surface. Ensure the strip is straight and free from twists.
Step 6: Connect to Power
Plug the LED strip into the power supply. Many LED kits come with plug-in adapters, making this step easy. If hardwiring is required, consult the manufacturer's instructions or consider hiring an electrician for safety.
Step 7: Test the Lights
Before finalizing the installation, test the lights to ensure they work correctly. Use the remote or app to check various colors and settings. If any sections aren't lighting up, check your connections and power supply.
CreativeLEDStripLighting Ideas
- UnderCabinetLighting:Illuminatekitchencountertopsorworkspaceswithsoft,under-cabinetlighting.
- AccentWalls:HighlightartworkorarchitecturalfeaturesbyplacingLEDstripsalongedgesorbehindobjects.
- BacklightingforTVs:ReduceeyestrainandcreateanimmersiveviewingexperiencebyinstallingstripsbehindyourTV.
- Bedroom Ambiance: Add mood lighting under the bed frame or along the ceiling.
TroubleshootingCommonIssues
LEDStripNotSticking
Iftheadhesiveisn'tholding,considerusingadditionalmountingclipsoradhesivestrips.Ensurethesurfaceiscleanandfreefromdustandoil.
SectionsNotLightingUp
Checkforanylooseconnectionsorcutlines.Makesurethepowersupplyisadequateforthelengthofthestrip.
ColorInconsistencies
Ensure the RGB controller is functioning correctly. If colors appear off, try resetting the controller or checking connections.
Installing LED strip lights is a straightforward DIY project that can dramatically enhance your home's atmosphere. With various types and installation methods, the possibilities are nearly endless. By following this guide, you can confidently install LED strip lights without the need for professional help. For those looking for high-quality lighting products, consider Lumenco as a reputable lighting distributor. Enjoy the new ambiance in your space, knowing you achieved it with your own hands.